Introduction to making API calls to SFMC from POSTman
Greg Gifford
Published on 05/03/2020
Cross posted to HowToSFMC from GORTONINGTON.
API calls are one of the most powerful tools available to an SFMC user. It essentially allows you to make changes, perform actions, retrieve data and more all programatically via an outside resource.
Below I will give a quick overview on setting up an API integration package and then utilizing it in POSTman. This includes, creating the package, the component and gathering the required information from Salesforce Marketing Cloud down to creating the environment and setting up an authentication call and test calls inside of POSTman.
Creating your Package:
First you will need to go into the ‘Setup’ section which is under your user name in the top right of the screen. You will need to hover over it and the dropdown should have one of the first options being ‘Setup’.

From there you will want to navigate on the left sidebar to ‘Platform Tools’ and then expand ‘Apps’ and select ‘Installed Packages’.

Click on ‘New’ in the top right. This will open a popup asking for name/description of your new package.
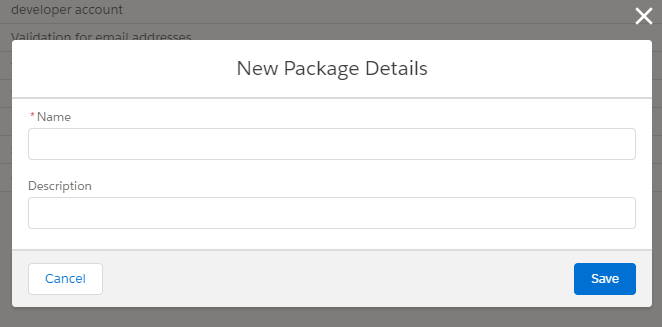
You then want to hit save to create your package.
Creating your Component:
Next part is the creation of the component inside the package to allow utilization of API integration between your external system and SFMC.
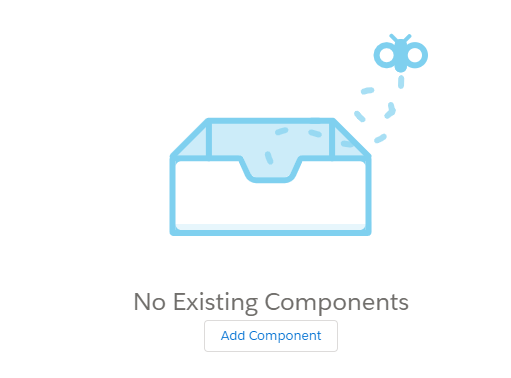
After building the package, this will then open up a screen with your new Package overview. The part we want to concentrate on is the bottom that involves ‘Components’. You will want to click on ‘Add Component’.
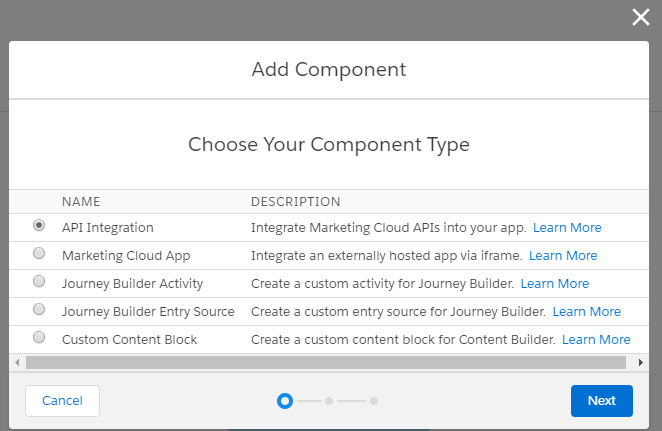
This will open a new popup to select the component type. For the purposes of this article, you will want to select ‘API Integration’. Then Click Next at the bottom.
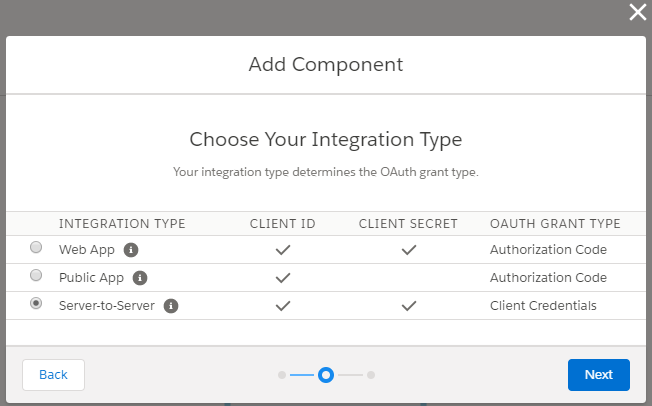
Next you need to select your integration type. For this article, I am going to choose ‘Server-to-Server’ as this is only going to be used via POSTman or similar services. For more information on Component Types, see official documentation here.
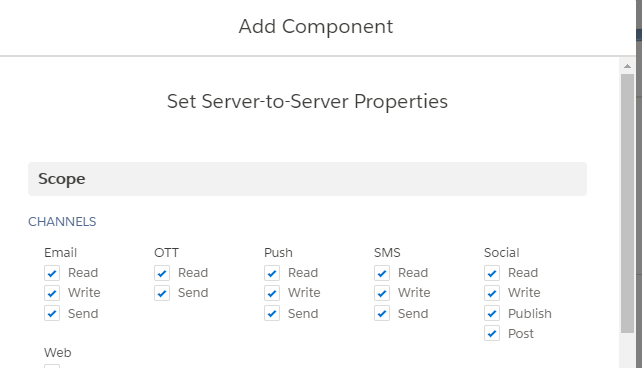
You will then need to assign the scope of your package (see official documents on scope here. For this article, I am going to allow full permissions on my package – basically allowing full access to the whole platform. After testing, you should make sure to go back and assign scope on your component as appropriate for your intended usage.
You then hit save and the new component will be added to your package.

You then will want to grab the following fields for use in your API call:
- Client Id
- Client Secret
- Authentication Base URI
- REST Base URI
- SOAP Base URI
(make sure to append/Services.asmxto the returned endpoint)
These will be used inside your POSTman API calls.
**EDIT** I wanted to give a quick thank you to Vishal Kumar C V and Renato Oliveira for bringing up that I did not include the append needed to be added to the SOAP Base URI (/Services.asmx) for the SOAP API to work. See more details inside of this Stack Exchange post.
POSTman Environment set up:
Next we will work on setting up an Environment in POSTman to best utilize your new Package in SFMC.
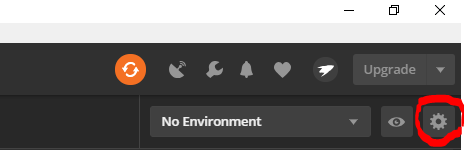
In POSTman you will want to navigate to the top right corner and select the gear icon to ‘Manage Environments’
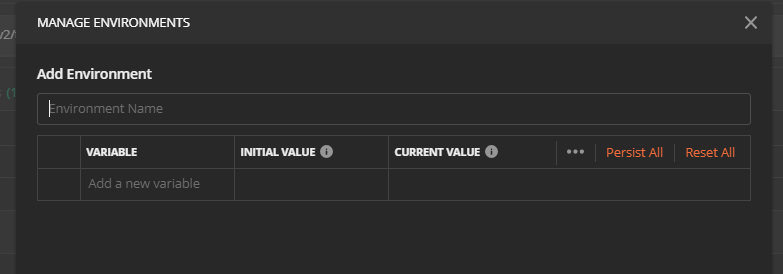
You will then want to click the ‘Add’ button at the bottom to open the following window:
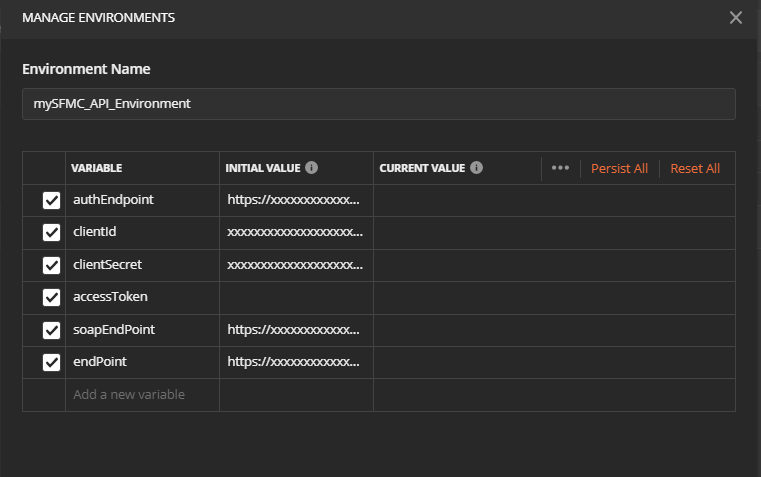
This is where you will add in the endpoints and id/secret information to your environment. What I would also recommend is adding a field named ‘accessToken’ that you can use to hold your returned Token from your Auth call. You do not need to insert a value into this field
Sample completed Environment below:
You will then want to click the ‘Add’ button at the bottom. This will then add your environment to your POSTman.
Making your Authentication call:
Now that you have your environment set up, you need to aim at retrieveing your token so that you can do your REST/SOAP API calls. First things first, verify that your environment is selected in the dropdown in the top right of your POSTman.
Below is a quick overview of the call, that you can use if you have familiarity with POSTman to set up your call:
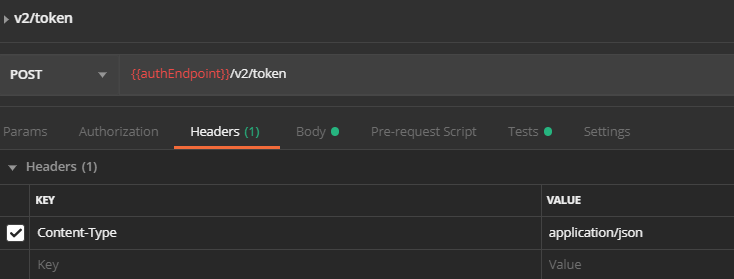
POST /v2/token
Host: {{authEndpoint}}
Content-Type: application/json

{
"grant_type": "client_credentials",
"client_id": "{{clientId}}",
"client_secret": "{{clientSecret}}",
"account_id": "{{mid}}"
}
For the visual learners, use the below images to help figure out where to put this information:

You will notice in my call, I have included a parameter account_id with a replacement named {{mid}}. This can be used to switch between BUs by assigning an MID to your environment and filling it in here. Please note that this can be included with mid being empty or null and it will still function as expected.
Another quick note to help auto-store your authentication is to utilize a script that can be added in the ‘Tests’ section in your Auth call. See below image and snippet:
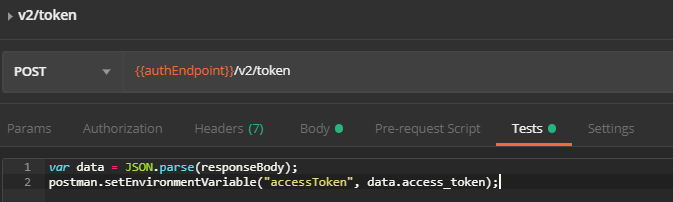
var data = JSON.parse(responseBody);
postman.setEnvironmentVariable("accessToken", data.access_token);
By adding this JS in, on each call of this, it will update the ‘accessToken’ var in your environment with the returned token in your Response.
After setting all of this up, you will want to click the ‘Send’ button in the top right, near where you set your environment.
Example Response:

Your Test Call in REST API:
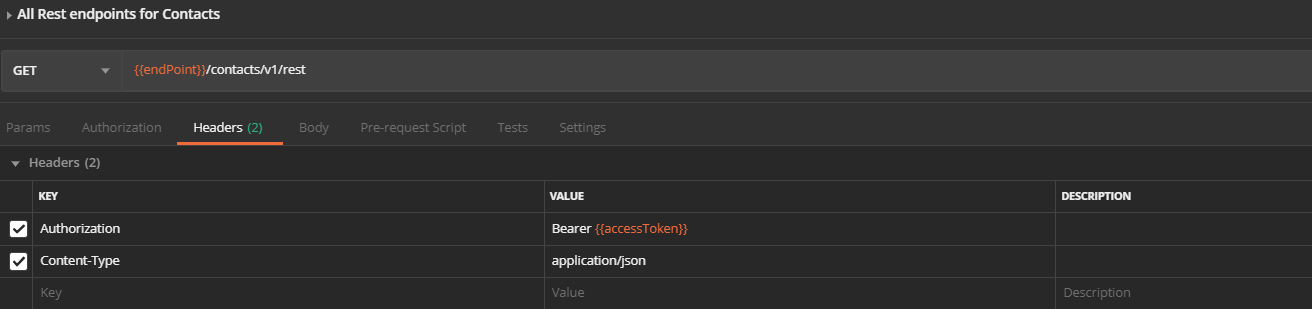
To test and make sure your environment and access token are set up properly, I am going to provide a very simple test API call. This call is basically a discovery call to gather all endpoints under a specific section. For this sample, we will use the ‘contacts’ section.
See below extract and image for setting up this call:
GET /contacts/v1/rest
Host: {{yourSubdomain}}.rest.marketingcloudapis.com
Authorization: Bearer {{yourToken}}
Content-Type: application/json
You then want to hit send in the top right. This should then return something like the below in the Response section:
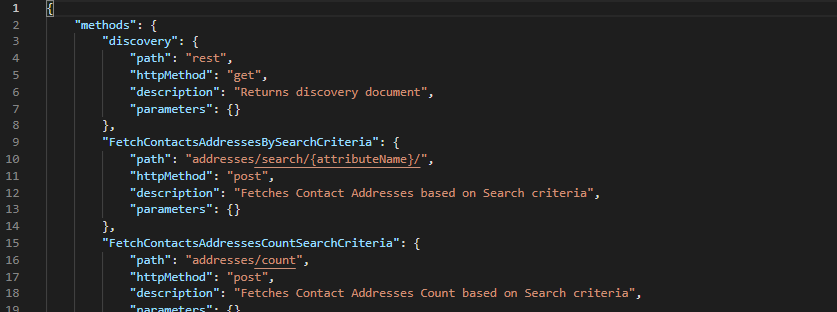
Congratulations! You have successfully completed a REST API call to your SFMC BU.
Your Test Call in SOAP API:
For this sample, I am going to do a quick example Retrieve on a Subscriber via SOAP. There are certain differences that need to be noted in SOAP that are not in REST.
Here is a down and dirty list:
- Method will always be POST
- Requires a header key of ‘SoapAction’ – value will mimic the request type. E.g. RetrieveRequest will be SoapAction = Retrieve
- Authentication is inside of the payload (body) of the call, not in the header.
- SOAP utilizes XML for the payload, unlike REST which uses JSON
- The endpoint that SOAP aims at is universal for all calls, the payload/body determines content and action
- SOAP has Methods (declared inside of payload/body) as well as Objects that are to be utilized to determine action and result.
- SOAP requires explicit declaration of Properties in retrieve calls
Below is an extract of the SOAP call on retrieving a subscriber:
POST /Service.asmx
Host: {{mySubDomain}}.soap.marketingcloudapis.com
Content-Type: text/xml
SoapAction: Retrieve

<?xml version="1.0" encoding="UTF-8"?>
    <soapenv:Envelope xmlns:soapenv="http://schemas.xmlsoap.org/soap/envelope/" xmlns:xsi="http://www.w3.org/2001/XMLSchema-instance">
            <soapenv:Header>
    <fueloauth>{{authToken}}</fueloauth>
  </soapenv:Header>
   <soapenv:Body>
      <RetrieveRequestMsg xmlns="http://exacttarget.com/wsdl/partnerAPI">
         <RetrieveRequest>
            <ObjectType>Subscriber</ObjectType>
            <Properties>SubscriberKey</Properties>
            <Properties>EmailAddress</Properties>
            <Properties>Status</Properties>
            <Filter xmlns:q1="http://exacttarget.com/wsdl/partnerAPI" xsi:type="q1:SimpleFilterPart">
               <q1:Property>SubscriberKey</q1:Property>
               <q1:SimpleOperator>equals</q1:SimpleOperator>
               <q1:Value>{{mySubkey}}</q1:Value>
            </Filter>
         </RetrieveRequest>
      </RetrieveRequestMsg>
   </soapenv:Body>
</soapenv:Envelope>
Below are a few Screenshots to help provide further context:


This should then return a SOAP envelope with the requested fields shown above inside of it. See below image showing a response to the above call:

Congratulations! You have now successfully created, implemented and performed an API call to SFMC!
For future API calls, you can check out this POSTman library of some sample SOAP and REST API calls to get you started. I believe they utilize hostEndPoint instead of endPoint in their environment variables. You may consider adjusting your Environment to fit those parameters if you utilize that library.